Runner
Introduction
Section titled “Introduction”What is the Runner?
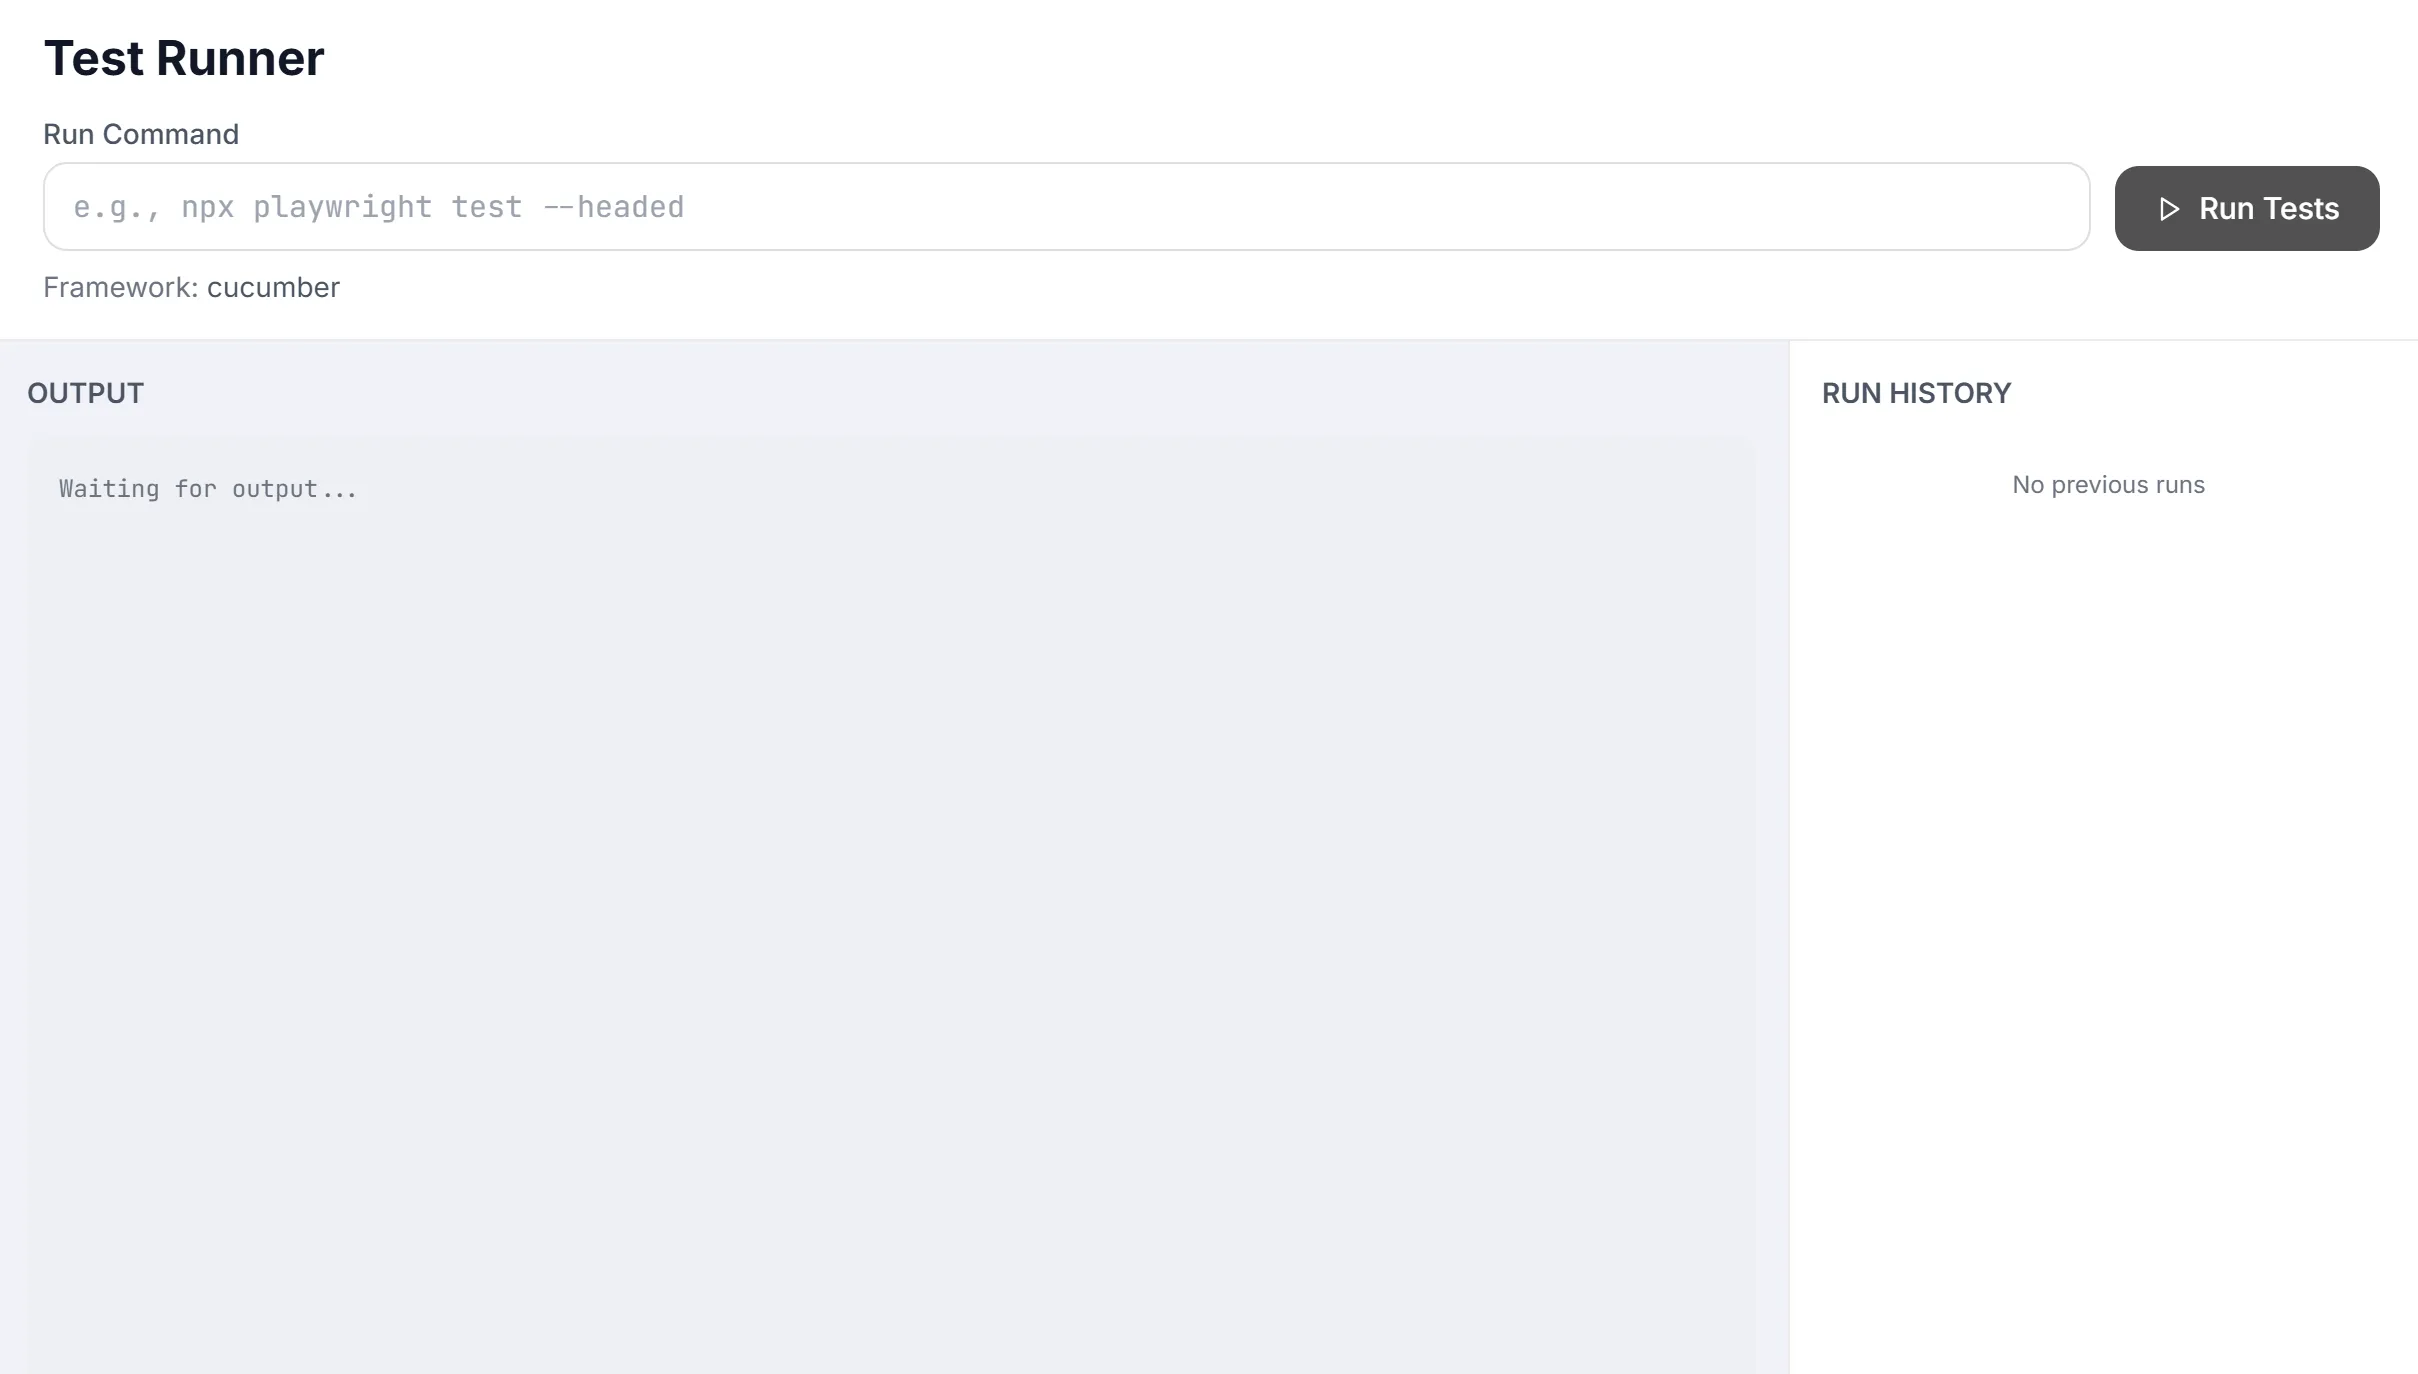
Section titled “What is the Runner?”The Runner (the Test Runner screen at /runner) is the launch pad for executing your tests. You type the command you’d normally run in a terminal — for example npx playwright test --headed — pick where it should run, press Run Tests, and Testver streams the live output, a progress bar, and a final summary straight into the page. No need to keep a terminal open or hunt through scrollback.
Think of it as a smart ‘play button’ wrapped around your existing test command. The command you type is exactly the one you’d run by hand; Testver just adds the conveniences around it — colorized live output, pass/fail counters that tick up in real time, a saved run history, one-click cloud execution, and (for mobile projects) a live picture of the phone the test is driving.
Who this guide is for
Section titled “Who this guide is for”- QA engineers and testers who want to run suites and watch results without living in a terminal.
- Developers verifying a change against the test suite before pushing.
- Mobile testers running Appium-family suites against real or cloud devices and watching the device live.
- Anyone who needs to run the same suite on a cloud grid (BrowserStack, LambdaTest, Sauce Labs) without hand-editing config files — Testver offers to patch the project for you. No prior Testver experience is assumed. If you can run your tests from a command line, you can use the Runner.
Key terms (glossary)
Section titled “Key terms (glossary)”| Term | What it means here |
|---|---|
| Run command | The exact shell command that launches your tests, e.g. npx playwright test. You type it into the Run Command field. |
| Framework | The test tool Testver detected for the project (Playwright, WebdriverIO, Appium, etc.). Shown on the status line; affects what extra controls appear. |
| Headed / headless | Headed means the browser/app window is visible while tests run; headless means it runs invisibly. This is controlled by your command (e.g. adding —headed), not by a toggle on this screen. |
| Local (this machine) | Runs the tests on the computer Testver is running on. The default for web projects. |
| Cloud grid / cloud provider | A hosted fleet of browsers and devices (BrowserStack, LambdaTest, Sauce Labs) you can run tests on instead of your own machine. |
| Local Devices | Real phones or emulators physically connected to this machine, driven through local Appium. Appears only for mobile projects when enabled in Connectors. |
| Build name | A label attached to a cloud run so you can find it later in the provider’s dashboard. Optional — leave blank for auto. |
| Appium | The automation engine for mobile apps. Projects using it are called ‘Appium-family’ and unlock the mobile device + app picker and live device preview. |
| Cloud-bridge (mobile) | Testver’s path that uploads your app, injects the cloud device capabilities, and mirrors the device — without changing your test code. |
| Session reuse | Attaching a test to an already-open recording session on the cloud device instead of booting a fresh one, saving ~30–60 seconds. Surfaced as a green badge when available. |
| Patch / cloud readiness | A small code change Testver can apply to your hooks/setup file so the suite connects to a cloud grid. Always previewed and optional. |
| Run ID | A unique identifier for one execution, used to link the run to its detailed results on the Results screen. |
How the screen adapts (web vs mobile)
Section titled “How the screen adapts (web vs mobile)”The Runner reshapes itself based on your project’s app mode (set during setup / in Settings → General) and which connectors you’ve enabled. You won’t see controls that don’t apply to your project.
| Project / state | What you see |
|---|---|
| Web-only project | Run Command field, Run Tests button, and — if any cloud provider is enabled — a Run on: row with Local plus each cloud provider. No device/app picker. |
| Web + cloud provider selected | A Build: field appears, and a cloud-readiness check runs before launch. |
| Mobile (Appium-family) project | The Run on: row drops the web Local button (a pure mobile workspace) and offers Local Devices and/or cloud grids. Selecting a cloud grid reveals the Mobile cloud-bridge device + app picker. |
| ‘Both’ workspace | Keeps the web Local button and offers Local Devices / cloud, since web tests can still run locally. |
| Mobile run in flight | The layout splits horizontally: command + output on the left, a full-height Live Device mirror on the right (replacing the Run History column). |
| Mobile project, nothing connected | An amber notice tells you to connect a device or enable a cloud grid in Connectors; Run Tests stays disabled. |
Getting Started
Section titled “Getting Started”Opening the Runner
Section titled “Opening the Runner”- Open Testver and select (or confirm) the project you want to run tests for.
- In the left navigation, click Runner (or browse to the
/runnerroute). - The header reads Test Runner, with the Run Command field below it.
- Check the status line under the controls — it confirms the detected Framework and current git branch so you know what you’re about to run against.
Screen layout
Section titled “Screen layout”| Area | Location | Purpose |
|---|---|---|
| Run Command field | Top, left | Type the test command to execute. |
| Run Tests / Stop button | Top, right of the command field | Launches the run; turns into a red Stop button while running. |
| Run on: row | Below the command (when providers exist) | Choose target: Local, a cloud provider, or Local Devices. |
| Build: field | Right of the provider row (cloud only) | Optional cloud build label. |
| Mobile cloud-bridge panel | Below the provider row (mobile + cloud) | Pick the device and app for a mobile cloud run. |
| Status line | Below all controls | Framework, git branch, selected cloud, and last-run status. |
| Live Progress card | Body, left (during a run) | Progress bar + live pass/fail counters and a streaming test list. |
| Run Complete summary card | Body, left (after a run) | Totals, pass rate, and Analyze / View Details actions. |
| Output panel | Body, left (always) | Raw, colorized stdout/stderr stream. |
| Current Runs / Run History column | Body, right (idle mode) | Active runs anywhere in the app, plus a list of past runs. |
| Live Device preview | Body, right (mobile cloud run) | Full-height read-only mirror of the phone under test. |
At a glance
Section titled “At a glance”- Type a command → press Run Tests → watch output and progress → read the summary. That’s the whole loop.
- Press Enter in the command field to launch (same as clicking Run Tests), as long as no run is already active.
- Everything you launch is recorded in Run History on the right and linked to full results on the Results screen.
- While a run is active the command field and provider buttons are locked — stop the run to change them.
Setting Up a Run
Section titled “Setting Up a Run”The Run Command field
Section titled “The Run Command field”The Run Command field is the single most important control on the screen. Whatever you type here is the command Testver executes. It’s rendered in a monospace font and shows a placeholder example until you type:
e.g., npx playwright test --headed- Type the full command exactly as you would in a terminal — including flags such as
--headed,--grep,--project, a spec path, etc. - Press Enter to launch immediately (equivalent to clicking Run Tests). Enter does nothing while a run is already in progress.
- The field is disabled while a run is active — it greys out so you can’t edit a command mid-run.
The framework / branch status line
Section titled “The framework / branch status line”Just below the controls, a muted status line keeps you oriented. It can show, left to right:
| Element | Meaning |
|---|---|
| Framework: ‹name› | The detected framework (e.g. playwright, appium-wdio), or auto-detect if none was resolved. |
| Branch chip (git icon) | The current git branch, in sky-blue, so you know which code you’re testing. |
| Cloud: ‹provider› | Shown in blue when a cloud provider is selected and no run is active — confirms where the run will go. |
| Running: ‹command› | A pulsing amber line during an active run, echoing the command in flight. |
| Last run: ‹status› (‹seconds›s) | After a run finishes — green for completed, red otherwise, with the duration. |
The Run-on targets
Section titled “The Run-on targets”When at least one provider is configured, a Run on: row appears so you can choose where the tests execute. Each option is a pill button; the selected one is highlighted. The exact set depends on your project and connectors.
| Option | Icon | Meaning |
|---|---|---|
| Local | Monitor | Run on this machine (web tests). The default. Hidden in a pure mobile workspace. Highlighted in the brand color when selected. |
| BrowserStack / LambdaTest / Sauce Labs | Cloud | Run on that hosted cloud grid. Shown for each enabled cloud provider. Highlighted in blue when selected; selecting one reveals the Build: field (and, for mobile projects, the device/app picker). |
| Local Devices | Smartphone | Run on a real phone/emulator connected to this machine via local Appium. Appears only for mobile projects with Local Devices enabled in Connectors. Highlighted in green when selected. |
In a pure mobile workspace the web Local option is omitted; Testver auto-selects a real target for you — preferring Local Devices, otherwise the first enabled cloud grid — so the device picker isn’t left empty.
The Build field (cloud only)
Section titled “The Build field (cloud only)”When a cloud grid is selected (but not for Local or Local Devices), a Build: input appears next to the provider pills.
- Type any label — e.g.
nightly-regressionorpr-482— to group this run under that build name in the provider’s dashboard. - Leave it blank to use the placeholder default auto, and Testver lets the provider name the build.
- Like the command field, it’s disabled while a run is active.
The mobile Device & App picker
Section titled “The mobile Device & App picker”For an Appium-family project with a cloud grid selected, a Mobile cloud-bridge panel slides in below the provider row. Its header shows a phone icon, the label Mobile cloud-bridge, your framework’s friendly name (e.g. WDIO + Appium), and an integration-tier badge on the right.
Integration tier badge
Section titled “Integration tier badge”The badge tells you how much Testver automates for your framework. Hover it for the full description.
| Badge | Color | Meaning |
|---|---|---|
| Full integration | Green | Zero-config (or near-zero) execution, live preview, results parsing, and session reuse — no code changes. Applies to WDIO/Appium, WebdriverIO, plain Appium, pytest+Appium, Java+Appium, and C#+Appium. |
| Preview + reuse | Cyan | Automatic live preview and session reuse, but results parsing needs setup. Applies to Ruby+Appium. |
Picking a device
Section titled “Picking a device”- In the Device: row, click the searchable picker and type to filter (e.g. Pixel, iPhone 15).
- Select a device; Testver records its name, platform (Android/iOS), and OS version.
- Cloud devices are addressed by their friendly name; Local Devices are addressed by their adb serial / iOS udid so the live mirror works.
- If the catalog fails to load, an error is shown inline in the picker.
Picking or uploading an app
Section titled “Picking or uploading an app”The App: row is a dropdown sharing the same app library used by AI Assistant and AI Record — anything you uploaded there appears here, and vice versa.
- Click the App: dropdown to open the library list. Each entry shows its label/filename plus kind and size (e.g. android · 24.3 MB).
- Click an app to select it (a check mark marks the current choice).
- To add a new build, click Upload .apk / .ipa at the bottom of the dropdown and choose a file; a percentage shows during upload, then the new app is auto-selected.
- To remove your choice, open the dropdown and click Clear selection.
- Alternatively, instead of picking from the library you can type a direct cloud reference (e.g.
bs://…,lt://…,storage:…) — this free-text path is used as a fallback when no library app is chosen.
Session reuse badge
Section titled “Session reuse badge”If you recently stopped a recording session (in AI Record), Testver may have issued a short-lived (~120s) reuse ticket. While it’s valid, a green badge appears under the picker:
- It reads “Reusing live recording session” with a sparkle icon, and on the right “saves ~45s · expires in Ns” counting down.
- When present and unclaimed, the run attaches to that already-warm device session instead of booting a fresh one — saving roughly 30–60 seconds.
- No action is needed; if the ticket is missing or expired, the run just opens a new session normally.
The automatic Cloud Configuration dialog
Section titled “The automatic Cloud Configuration dialog”When you launch a web cloud run, Testver first analyzes whether your project is ready to talk to that grid. If it isn’t, the Cloud Configuration Needed dialog appears (titled Cloud Ready instead if everything’s already fine). This step is skipped entirely for local runs and for mobile cloud-bridge runs (the mobile overlay handles connection without touching your code).
The dialog shows a Detection Summary — detected framework, language, the hooks file it found, and whether Cloud Connect and Session Status handling are Present or Missing. Below that, depending on the result, you’ll see one of: a green ‘no changes needed’ message, a list of Changes Required patches each with a Preview / Hide toggle that reveals a side-by-side Original vs Patched diff, an already-patched notice, or an amber ‘no hooks found’ warning explaining you can still run with cloud env vars injected.
| Button | When it shows | What it does |
|---|---|---|
| X (close, top-right) | Always | Cancels the dialog without running (same as Cancel). |
| Preview / Hide | Per patch, when changes are required | Expands or collapses the side-by-side Original vs Patched diff for that file. |
| Cancel | Always | Closes the dialog and does not run. |
| Skip & Run Anyway | When changes are required | Runs without applying any patches — relies on injected cloud env vars to connect. |
| Apply & Run | When patches are available | Applies the previewed code changes to your hooks file, then launches the run. Shows Applying… while working. |
| Run on Cloud | When project is already cloud-ready | Proceeds straight to the run — no changes needed. |
| Run Anyway | Not cloud-ready and no patches available | Runs with cloud env vars only (e.g. your code must read SELENIUM_REMOTE_URL). |
Launching & Watching a Run
Section titled “Launching & Watching a Run”Starting and stopping
Section titled “Starting and stopping”- Enter your command, choose a target, and (for mobile) pick a device + app.
- Click Run Tests (Play icon) or press Enter in the command field.
- For a web cloud run, the button briefly reads Checking… with a pulsing cloud icon while readiness is analyzed; respond to the dialog if it appears.
- Once running, the button becomes a red Stop button (Square icon). A toast confirms where it started, e.g. “Test run started locally” or “Test run started on BrowserStack”.
- Click Stop at any time to cancel the active run.
Live Progress
Section titled “Live Progress”Once tests begin reporting, a Live Progress card appears at the top of the body (it shows as soon as the first test is counted).
- A two-tone progress bar fills green for passed and red for failed, proportional to results so far, with elapsed seconds on the right.
- A counter row shows the current Test #, a green check with the passed count, a red X with the failed count, and — with a spinner — the name of the test currently running.
- A scrolling live test list shows the most recent ~30 tests, each with a pass (green check) or fail (red X) icon; failed names are tinted red.
The Output panel
Section titled “The Output panel”The Output panel below shows the raw process output, combined into proper lines and rendered in a monospace, terminal-style block on a dark background.
- ANSI colors are preserved — your framework’s colorized output looks the same as in a terminal.
- stderr lines are tinted red so errors stand out from normal stdout.
- The panel auto-scrolls to the newest line as output streams in.
- Before anything is printed it shows “Waiting for output…”.
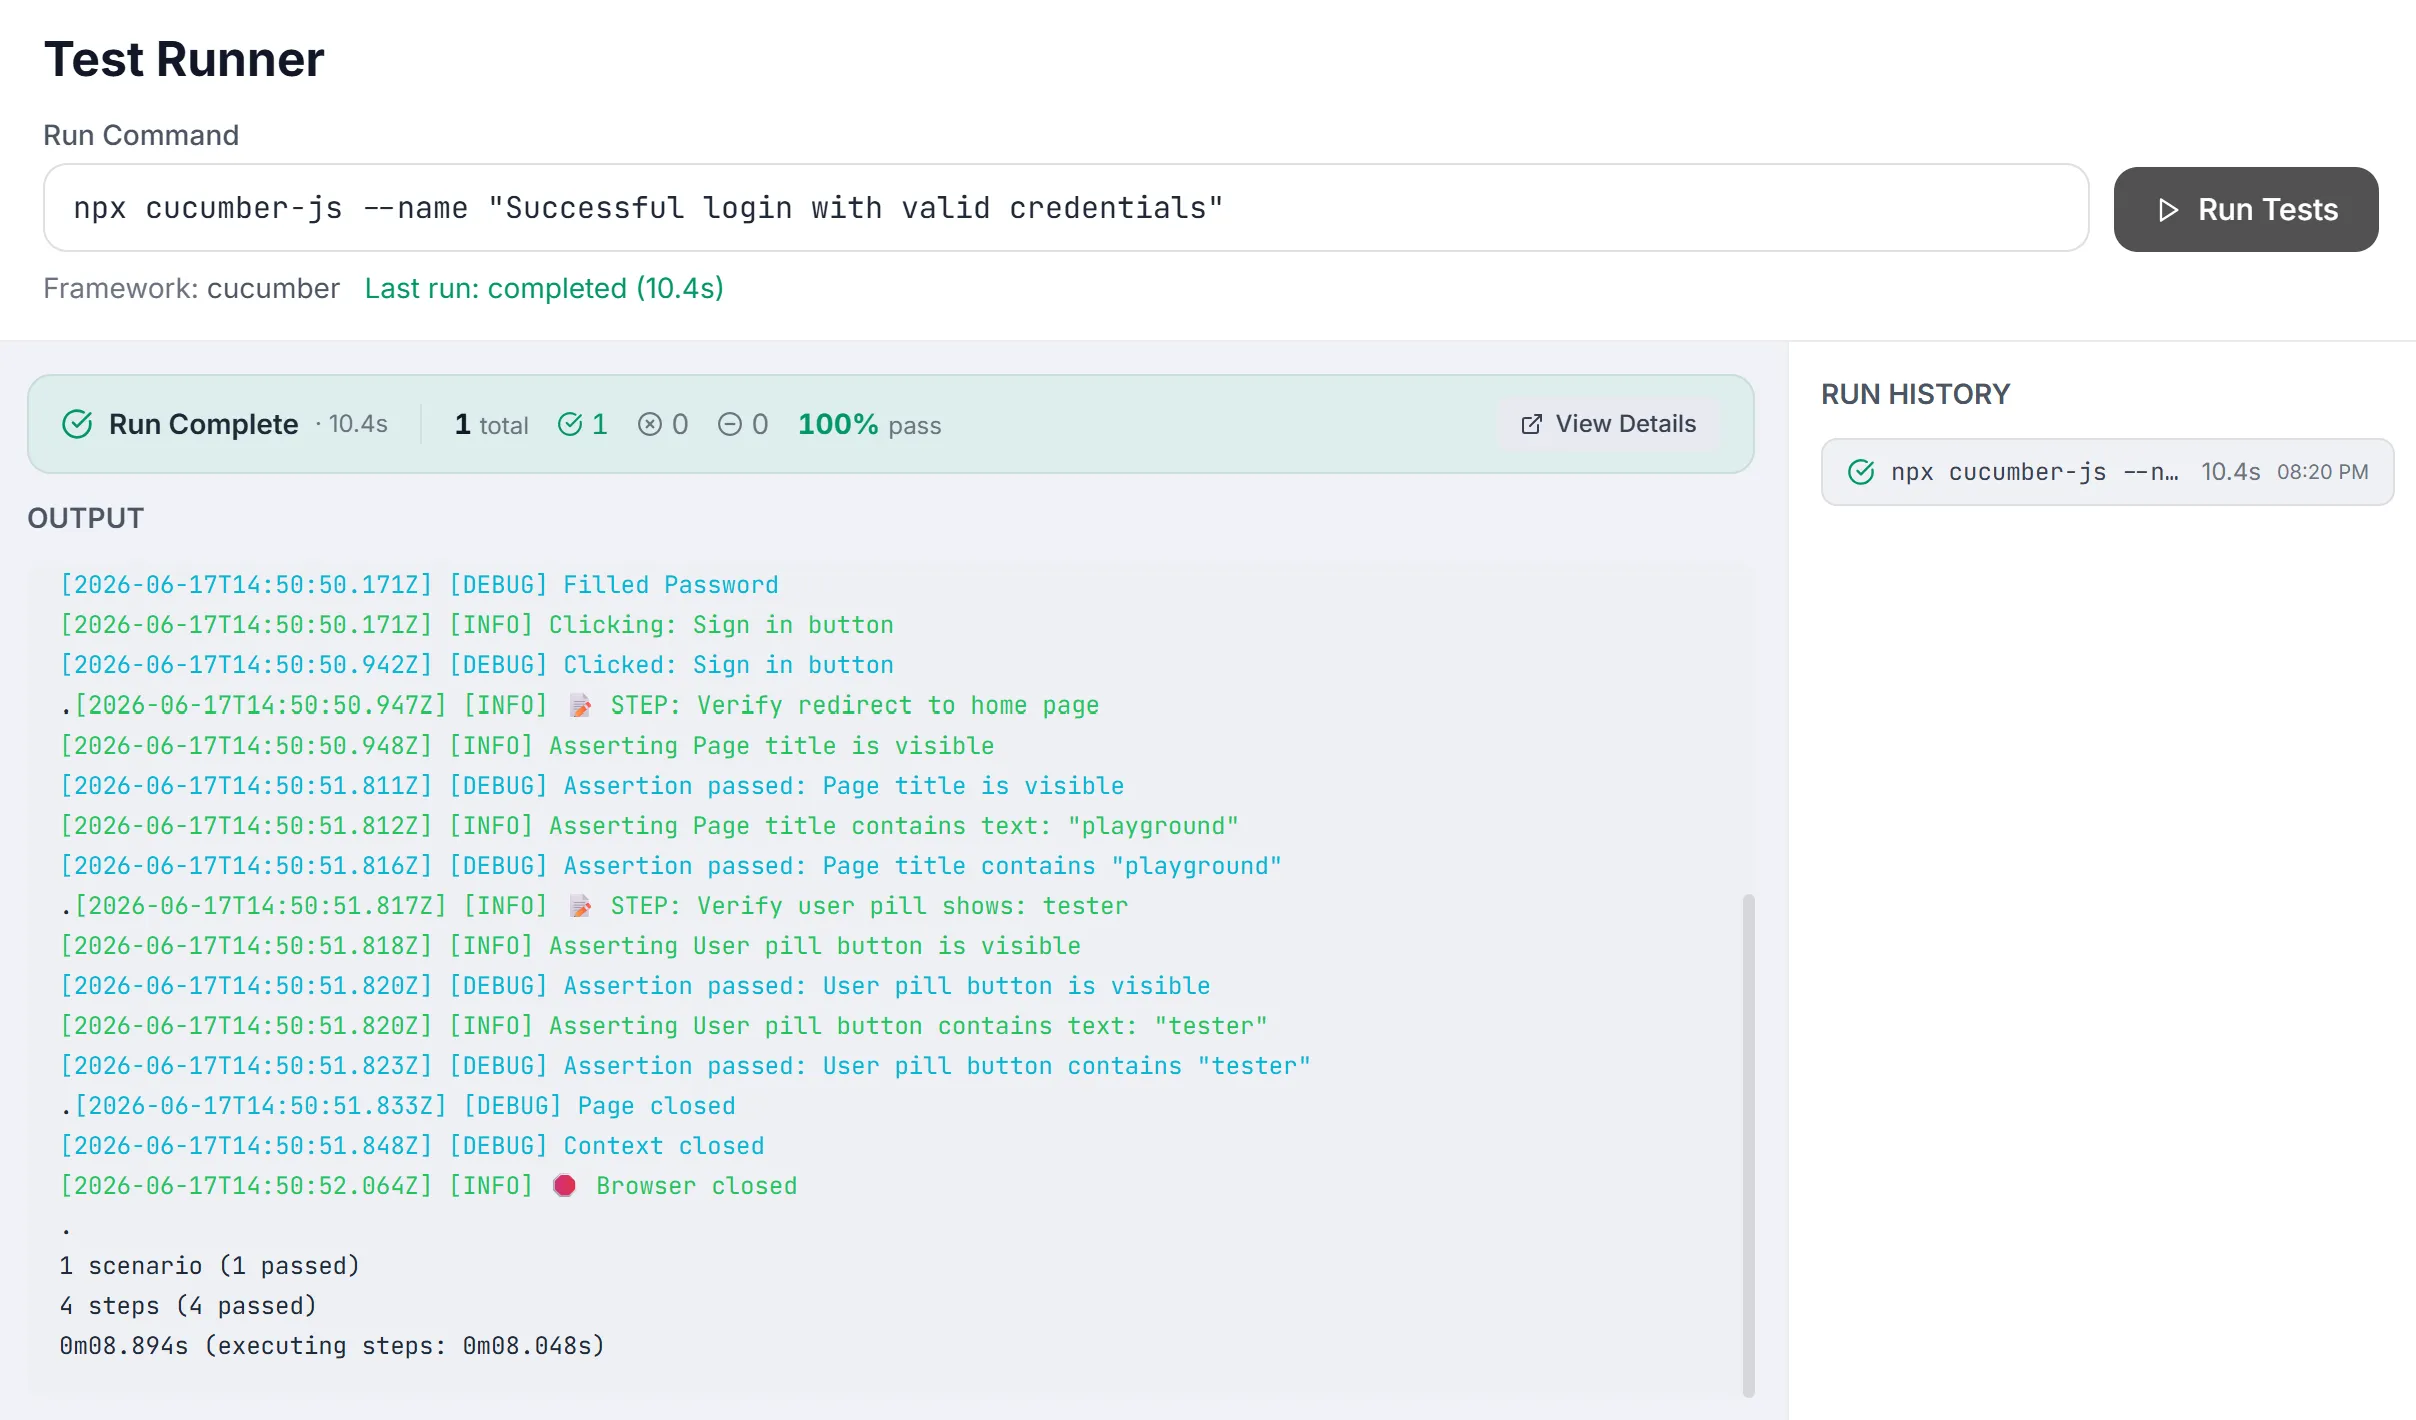
The Run Complete summary card
Section titled “The Run Complete summary card”When a run finishes, a compact Run Complete card replaces the live progress card. It leads with a status icon (green check if nothing failed, red X otherwise), the duration, and inline stats: total, passed, failed, skipped, and a color-coded pass rate percentage (green ≥90%, amber ≥70%, red below).
| Button | When it shows | What it does |
|---|---|---|
| Analyze (brain icon) | Only when there were failures | Opens this run on the Results screen for AI-assisted failure analysis (/results?runId=…). |
| Re-run Failed (rotate icon) | When failures exist and a re-run handler is available | Re-runs just the failed tests. |
| View Details (external-link icon) | Always | Opens the full results for this run on the Results screen. |
Current Runs & Run History side panel
Section titled “Current Runs & Run History side panel”In idle (non-mobile-preview) mode, the right column hosts two stacked sections.
Current Runs
Section titled “Current Runs”- Lists runs active anywhere in the app (including scheduled ones), excluding the one you’re already watching here.
- Each card shows a pulsing dot, the command, an optional Cloud provider badge, a Scheduled badge (calendar icon) if it came from the scheduler, live passed/failed counts, and elapsed seconds.
- Click a card to attach to that run and stream its output into the main panel.
- Click the small Stop (square) icon on a card to cancel that run without attaching.
Run History
Section titled “Run History”- Lists previous runs, newest at the top, each with a status icon — completed (green check), failed (red X), running (amber clock), or cancelled (grey ban).
- Shows the command, duration, and the start time (HH:MM).
- If there are none, it reads “No previous runs”.
Mobile Live Device Preview
Section titled “Mobile Live Device Preview”During a mobile cloud run, the layout switches to a horizontal split: the command and Output stay on the left, and a full-height Live Device mirror takes the right column (replacing Run History so the tall phone screen gets maximum vertical space).
- The header shows a phone icon, Live Device, the device name, a pulsing amber Test driving indicator, and a Dashboard link to open the provider’s session page in a new tab.
- The screen is a read-only mirror, refreshed roughly once per second from the same screenshot stream AI Assistant uses (a live image, not an embedded iframe).
- While the test drives the session, the image is slightly muted and a banner reads “Your test is driving this session — interactions paused” so you don’t tap and conflict with the test.
- Clicks aren’t blocked, so you can still right-click → save the image to capture device state mid-run.
- Before the first frame arrives it shows “Waiting for the test’s cloud session…” with a spinner; the first frame typically appears within a few seconds of session creation.
- If there’s no session and no run, it shows guidance to click Run (a cloud session opens automatically) or connect a device in AI Assistant.
Common Tasks (How Do I…?)
Section titled “Common Tasks (How Do I…?)”| I want to… | Do this |
|---|---|
| Run my whole suite locally | Type the command, leave the target on Local, click Run Tests. |
| Run just one spec or test | Add your framework’s filter to the command (e.g. a spec path or —grep), then Run Tests. |
| See the browser while it runs | Add the headed flag to your command (e.g. —headed) — there is no separate toggle. |
| Run on a cloud grid | Pick the provider in Run on:, optionally set a Build: name, then Run Tests; respond to the cloud-config dialog if it appears. |
| Make my project cloud-ready | Launch a cloud run; in the dialog, Preview the patches then click Apply & Run. |
| Run on a real connected phone | Enable Local Devices in Connectors, pick Local Devices, choose the device + app, then Run Tests. |
| Run a mobile app on a cloud device | Pick a cloud provider, choose a device, pick or upload the app (.apk/.ipa), then Run Tests. |
| Stop a run | Click the red Stop button (or the Stop icon on a Current Runs card). |
| Watch a run started elsewhere | Click its card under Current Runs to attach and stream its output. |
| Re-open a finished run’s details | Click View Details on the summary card, or use Analyze if it had failures. |
| Find an earlier run | Scan the Run History list on the right (status, command, time). |
| Speed up repeated mobile runs | Keep the green session-reuse badge in mind — run again while it’s valid to attach to the warm session. |
Tips & Best Practices
Section titled “Tips & Best Practices”- Use the placeholder as a template.
npx playwright test --headedis a good starting point — adapt it to your framework and flags. - Press Enter to launch. Once your command is typed, Enter is faster than reaching for the button.
- Name your cloud builds. A meaningful Build: label (e.g.
pr-482) makes runs easy to find in the provider dashboard later. - Preview patches before applying. Always expand the diff in the cloud-config dialog so you know exactly what changes land in your hooks file.
- Re-use uploads. Mobile app uploads are content-hashed — keep using the same build to skip re-upload time.
- Let session reuse work for you. If you just finished an AI Record session, launching a mobile run promptly attaches to the warm device and saves ~45s.
- Watch the live preview, not the command. During a mobile run the device mirror is your primary signal — don’t try to tap it; the test is in control.
- Use Analyze for failures. When a run has failures, jump straight to AI analysis with the Analyze button instead of digging through raw output.
Troubleshooting & FAQ
Section titled “Troubleshooting & FAQ”Where’s the headless toggle?
Section titled “Where’s the headless toggle?”There isn’t one — by design. Headed vs headless is controlled entirely by your Run Command. Add your framework’s headed flag (e.g. --headed for Playwright) to see the browser, or omit it to run headless.
Why is Run Tests disabled / greyed out?
Section titled “Why is Run Tests disabled / greyed out?”- A run is already active — the button is now a red Stop; stop it first.
- A web cloud-readiness check is in progress (the button reads Checking…).
- It’s a mobile project with no device target configured — you’ll see an amber notice pointing you to Connectors.
- It’s a mobile run missing a device and/or app — hover the button; the tooltip says “Select a device and an app first.”
- The command field is empty — clicking shows “Please enter a run command.”
Why don’t I see any cloud / Local Devices options?
Section titled “Why don’t I see any cloud / Local Devices options?”The Run on: row only appears when at least one cloud provider is enabled, or (for mobile) when Local Devices is enabled. Enable them under Settings → Connectors. A plain web project with nothing configured simply runs locally with no picker.
Will running on the cloud change my code?
Section titled “Will running on the cloud change my code?”Only if you let it. For web cloud runs Testver may offer patches — but it always previews them and waits for Apply & Run; you can Skip & Run Anyway to leave your code untouched and rely on injected env vars. For mobile cloud-bridge runs, no code changes are made at all — the overlay injects the hub URL and capabilities externally.
I changed my app build — will it re-upload?
Section titled “I changed my app build — will it re-upload?”Yes, but only if the file actually changed. Uploads are cached by SHA-256 content hash, so an identical build is recognized and skips re-upload. A genuinely new .apk/.ipa uploads once, then is cached for subsequent runs.
The mobile preview is stuck on “Waiting for the test’s cloud session…”
Section titled “The mobile preview is stuck on “Waiting for the test’s cloud session…””The test subprocess is still spinning up its cloud session. The first frame usually appears within a few seconds of session creation. If it never appears, check the Output panel for connection errors and confirm your device/app selection and provider credentials in Connectors.
Can I tap the live device during a run?
Section titled “Can I tap the live device during a run?”No — the test is the sole authority over the session for the run’s duration, which is why the “interactions paused” banner appears. You can still right-click → save the image to capture state. For interactive control, use AI Assistant outside of a run.
Related
Section titled “Related”- Test Explorer — pick what to run.
- Results — full run artifacts.
- Schedules — recurring runs.
- Browser Sessions — see and close active browser processes.
- Connectors → Cloud test grids.