First-time setup
Introduction
Section titled “Introduction”What first-time setup does
Section titled “What first-time setup does”First-time setup runs exactly once per Testver instance. It establishes two things the app cannot start without: which kind of testing you do (so Testver shows the right surfaces) and who the first administrator is (so there is an account that can sign in and manage everyone else). Everything else — AI providers, projects, teammates — can be added afterwards at your own pace.
Who does this
Section titled “Who does this”The person installing Testver — typically a QA lead or whoever stood up the server. You only do this once. After the admin exists, everyone else simply signs in; they never see this wizard.
Before you begin
Section titled “Before you begin”Make sure the Testver UI is actually running and open in your browser. If it is not, follow Install Testver first.
| You need | Detail |
|---|---|
| Testver running | The UI open at http://localhost:3700 (or your team’s hosted URL). |
| A username & password in mind | The admin login you will use every day. |
| (Optional) an AI provider key | Only if you want AI features connected during setup — you can add it later. |
The setup wizard
Section titled “The setup wizard”The wizard has two steps, shown with a small step indicator at the top.
Step 1 — Choose your testing mode
Section titled “Step 1 — Choose your testing mode”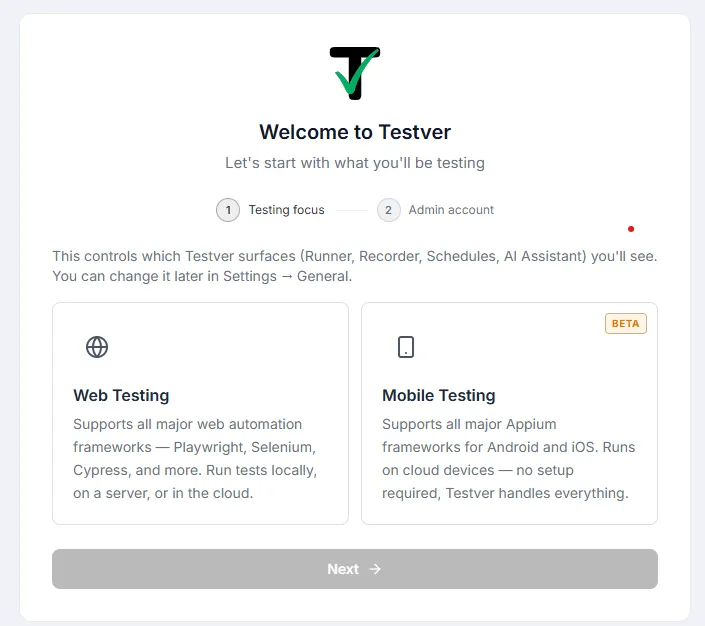
Pick the kind of automation this instance is for. Your choice controls which surfaces (Runner, Recorder, Schedules, AI Assistant) Testver shows you, so the UI isn’t cluttered with tools you don’t need.
| Mode | Best for | Notes |
|---|---|---|
| Web Testing | Browser automation | Supports all major web frameworks — Playwright, Selenium, Cypress, and more. Run tests locally, on a server, or in the cloud. |
| Mobile Testing (Beta) | Android & iOS apps | Supports all major Appium frameworks. Runs on cloud devices — no local setup required, Testver handles everything. |
Select a tile and click Next.
Step 2 — Create the administrator account
Section titled “Step 2 — Create the administrator account”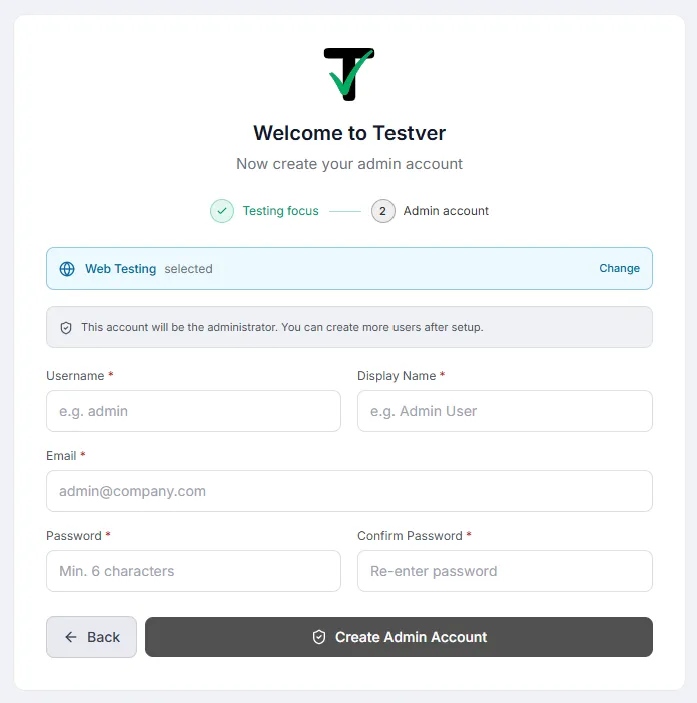
Fill in the admin account form. A recap chip at the top shows the mode you picked in Step 1 with a Change link if you want to go back.
| Field | Required? | Guidance |
|---|---|---|
| Username | Required | What you’ll sign in with. Lowercase, no spaces. Cannot be changed later. |
| Display name | Optional | What other users see next to your username (e.g. “Donthi Reddy”). |
| Optional | Used for password resets and notifications where configured. | |
| Password | Required | At least 8 characters. Use a strong, memorable one. |
| Confirm password | Required | Must match the password exactly. |
Click Create account. Testver creates the admin, signs you in, and takes you to the dashboard. Setup is now complete.
After setup: recommended next steps
Section titled “After setup: recommended next steps”These are optional but make Testver far more useful. None of them are part of the wizard — you do them from the dashboard once you’re signed in.
Connect an AI provider
Section titled “Connect an AI provider”Many of Testver’s best features — AI Assistant, AI Test Gen, AI Record — need a Large Language Model. Connect one from Settings → LLM Providers.
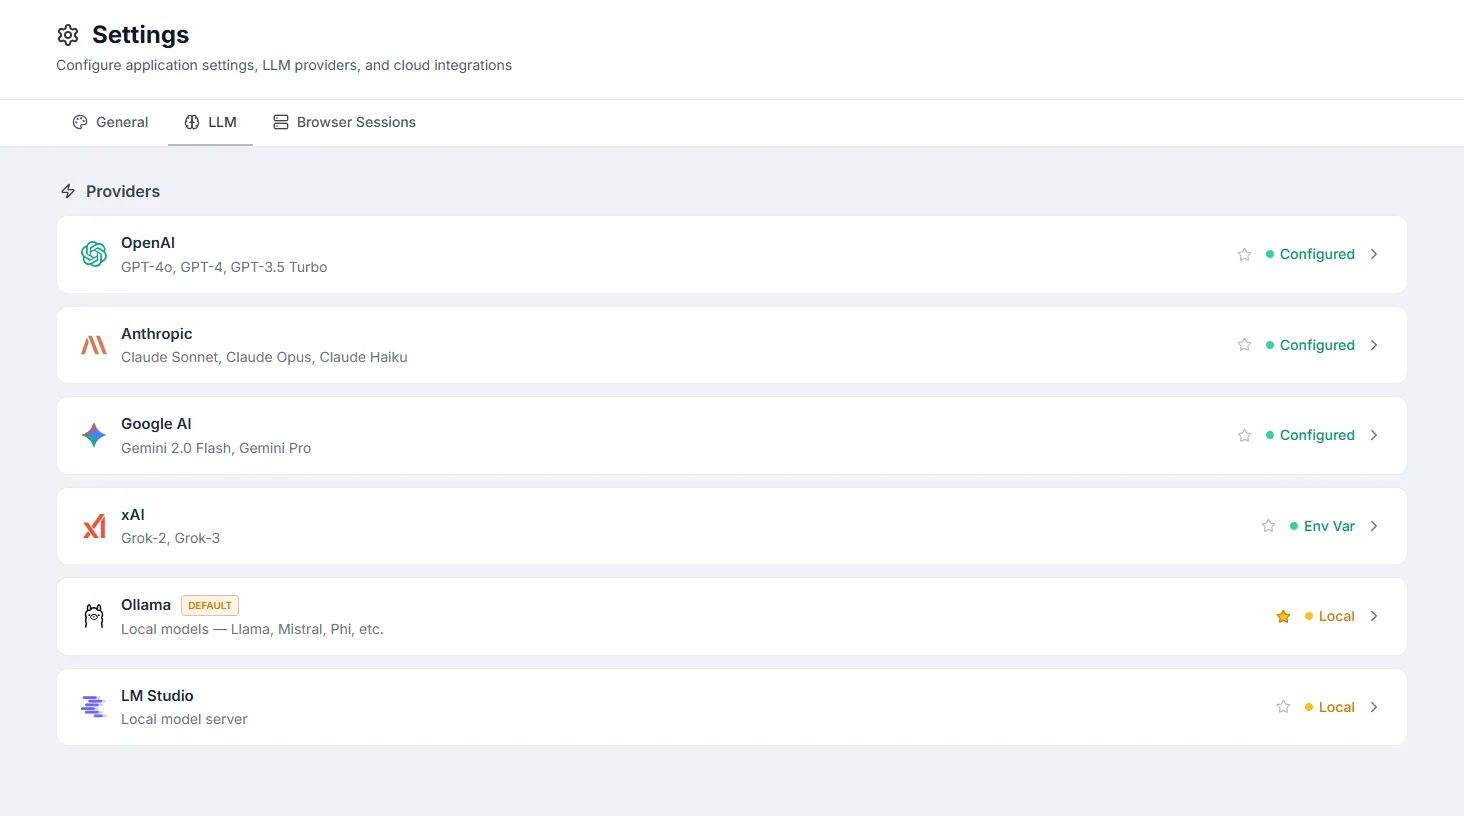
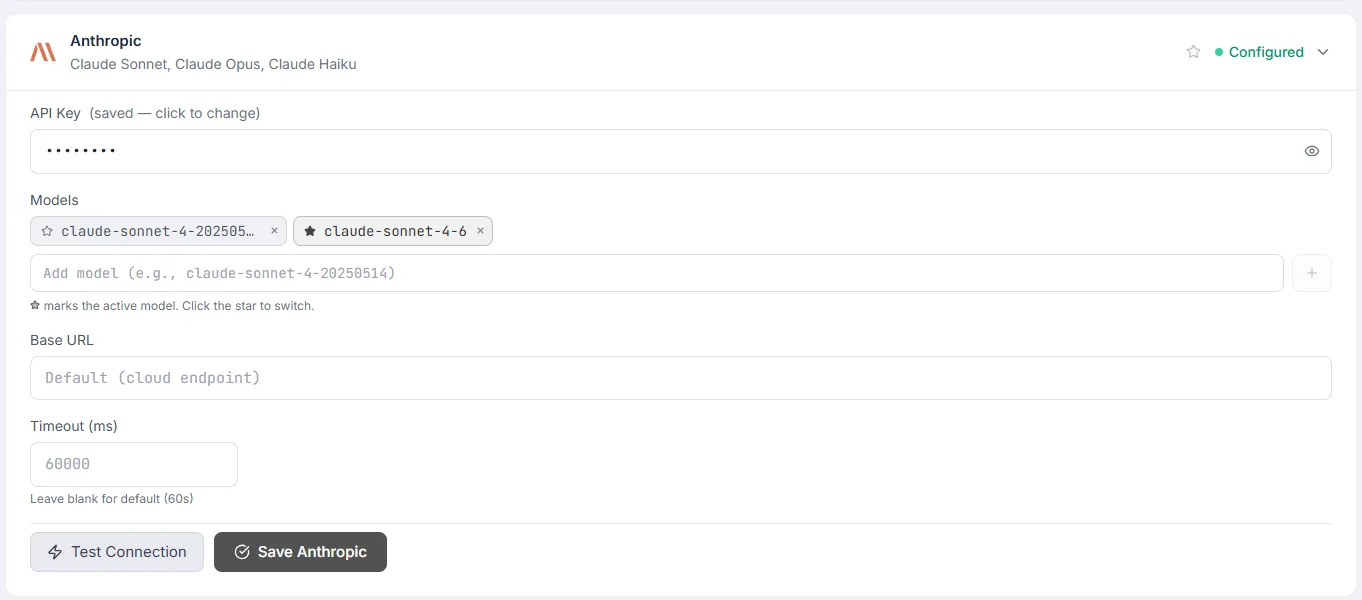
Cloud providers — paste an API key, Add model and then click Save & Test:
| Provider | Where to get a key |
|---|---|
| OpenAI | platform.openai.com/api-keys |
| Anthropic (Claude) | console.anthropic.com/settings/keys |
| Google Gemini | aistudio.google.com/apikey |
| xAI (Grok) | console.x.ai |
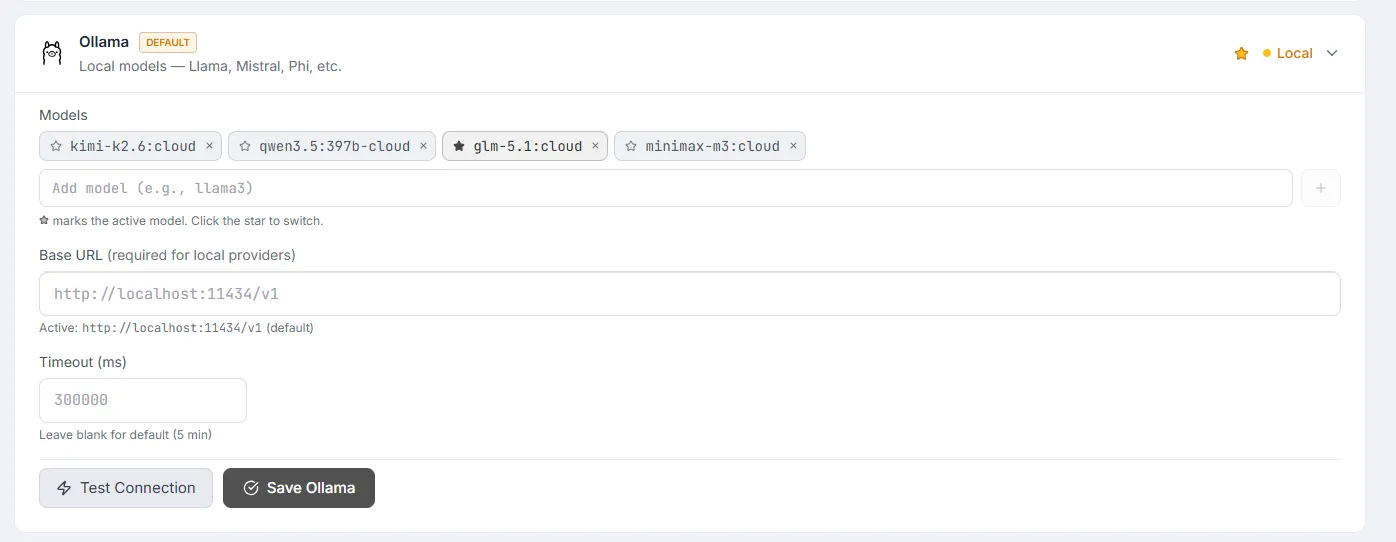
Local providers (free, no key, nothing leaves your machine) — Testver auto-detects these at their default URLs; just add model and click Test Connection:
- Ollama — install, then run
ollama pull llama3andollama serve. - LM Studio — install, load a model, click Start Server.
After at least one provider connects, pick it as the default. You can switch any time from the AI Assistant or Settings.
Open your project
Section titled “Open your project”If you have a folder of automation tests on disk (Playwright, Cypress, Selenium, etc.), point Testver at it:
- Top-right → Open Project (Testver may also prompt you automatically).
- Browse to the project’s root folder — the one containing
package.jsonor your test files. - Confirm.
Testver scans the folder, detects the framework, and lists your tests in the Test Explorer.
Verifying everything works
Section titled “Verifying everything works”A quick checklist to confirm you’re fully set up:
- You can see the dashboard and the left sidebar of screens.
- Your display name / avatar appears top-right.
- If you connected AI: opening the AI Assistant shows it ready (not “no provider configured”).
- If you opened a project: the Test Explorer lists your test files and the header shows the detected framework.
Inviting your team
Section titled “Inviting your team”Once you’re the admin, add the rest of your team from Admin → Users:
- Click + New User.
- Set a username, optional display name/email, a role (default to Tester), and an initial password.
- Share the credentials securely; ask them to change the password from Profile → Change password on first sign-in.
See the Users guide for the full role breakdown (Admin / Tester / Viewer).
Tips & best practices
Section titled “Tips & best practices”- Use a real, memorable admin password — it’s the master key to the instance. Don’t reuse a throwaway.
- Keep the admin group small. Create most teammates as Testers; reserve Admin for one or two people.
- You can change the testing mode later in Settings → General, so don’t overthink Step 1.
- Connect a local LLM (Ollama / LM Studio) for zero-cost AI if you’d rather not pay per token or send data to a cloud provider.
Troubleshooting
Section titled “Troubleshooting”| Symptom | Likely cause & fix |
|---|---|
| I see a login screen, not the wizard | An admin already exists. Sign in instead, or have the admin reset your access. |
| ”Setup required” keeps appearing | No admin was created yet — complete the wizard. If it loops, confirm the server can write its data store. |
| Next is disabled on Step 1 | You haven’t selected a mode tile. Click Web or Mobile first. |
| ”Passwords do not match” | The confirm field differs from the password. Re-type both carefully. |
| AI Save & Test fails | Check the key is pasted whole with no stray spaces, and that the provider account is active/funded. Local providers must be running first. |
| Project scan finds no tests | You pointed at the wrong folder. Choose the project root (where package.json / your specs live), not a parent directory. |
Frequently asked questions
Section titled “Frequently asked questions”Can I change the testing mode after setup?
Section titled “Can I change the testing mode after setup?”Yes — Settings → General. It only controls which surfaces are shown, not your data.
Is the AI provider mandatory?
Section titled “Is the AI provider mandatory?”No. Manual test management works without it. AI-powered features need a provider, which you can connect at any time.
What if I pick the wrong person as admin?
Section titled “What if I pick the wrong person as admin?”Sign in as that admin, create the correct person as an Admin from Users, then disable or delete the original.
Does first-time setup run on every machine?
Section titled “Does first-time setup run on every machine?”No — it runs once per Testver instance. Teammates connecting to the same instance just sign in.
Related
Section titled “Related”- Install Testver — get the UI running (do this first).
- Sign in — the daily login flow after setup.
- A 5-minute tour — find your way around the whole UI.
- Users — invite teammates and assign roles.
- Settings — connect AI providers and configure the instance.